-
Grow Your Own Chillies

Chilli’s are one of the easiest plants to grow so it’s little surprise that so many of us grow our own. Each year new varieties come to market, some that will blow your socks off. The continued interest in ‘grow your own chillies’ means there’s now over 400 varieties from which to choose. ‘Chilli heads’ may opt for varieties such as Habanaro or Naga whilst others may prefer chillies from the milder end of the scale, something like a Poblano or the slightly hotter but very popular Jalapeno. Growing and eating your own chillies is both rewarding and healthy. With a little care and attention most plants will reward you with a healthy crop. You don’t need alot of space or a degree in horticulture just a little space on a warm windowsill and a little TLC.
When to plant chilli seeds
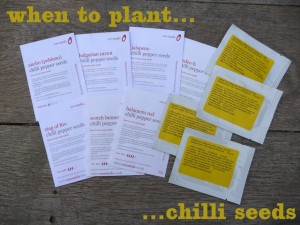
The ideal time to plant chilli seeds in the UK is the beginning of March although you can generally plant them any time from the beginning of February until the end of April. At this time of year they will need to be sown indoors where a temperature of around 21° C will facilitate germination.
The best Compost for Chilli Seeds
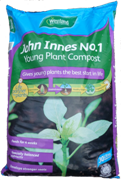
Chillies like a loose fast draining compost. We’ve opted to use a John Innes compost which also happens to have the right pH for growing chillies (6 to 7). For germination we’ll be using John Innes No.1 which is specifically formulated for seedlings. Once the plants are ready for potting on they are a little hardier and so they will be able to deal with the higher level of nutrients found in John Innes No.2. It’s John Innes all the way from seed to mature plant by the way. So how do you know when your seedling is ready to be repotted?
Potting On
Stage 1
To start off plant the chilli seeds in small cells or trays. A cheap and simple solution is to use a toilet roll tube. As the seedling grows it first produces cotyledons which will soon whither and make way for the first “true” leaves. Once the first two true leaves have developed your seedling will be ready to be moved to a 9cm pot. Carefully remove the seedling from the tube or tray to avoid any potential damage to the seedling or it’s roots.
Stage 2
Fill the 9cm pot three quarters full with John Innes number 2 compost. Clear enough space using a dibber (or your finger) in the centre of the compost to ease the young seedling into position. Gently firm up and water. The seedling should remain in this pot until it reaches approximately 10cm in height.
Stage 3
Once the chilli plant reaches 10cm in height it can be potted on for the final time. The size of the next pot is entirely your choice and you may even choose to plant it directly into the garden. It is not always best to go for a large pot on the basis that the chilli plant might expend too much energy on developing a significant root structure rather than developing flowers. With this in mind we recommend limiting the pot size to 3 or 4 litres. The final compost we’ll be using for this stage is John Innes Number 3.
Looking after chilli plants
Having reached stage three a little ongoing maintenance will ensure you maximise your potential chilli harvest. Firstly consider giving your chilli plants a little support for the forthcoming bumper harvest. Loosely tying the main stem to a wooden cane will suffice. Once the plant exceeds 20cm in height pinch out the main stem to encourage the plant to bush out. This will result in more flowers which will ultimately lead to fruit.


If you're looking for a new glasshouse for your garden then you might be interested in the new greenhouse range from Cultivar. Innovatory and stylish, get a quote online today by visiting cultivargreenhouses.co.uk
Popular Articles